

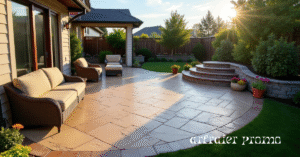
Concrete is durable, but over time it can crack, discolor, or wear down. Instead of replacing it entirely, resurfacing concrete is a cost-effective and smart way to give it new life. Whether you’re dealing with a worn-out driveway, patio, or basement floor, resurfacing can restore your concrete’s appearance and function.
This guide walks you through the types of concrete resurfacing, tools you’ll need, and a step-by-step process you can follow yourself.
What Is Concrete Resurfacing?
Concrete resurfacing is the process of applying a thin overlay or coating to an existing concrete surface to restore its look and improve durability. It helps fix minor damage such as small cracks, surface stains, or chipping without tearing up the whole slab.
According to experts at Concrete Network, resurfacing is ideal for concrete that’s still structurally sound but shows signs of minor wear, discoloration, or surface damage.
Types of Concrete Resurfacing
There are several types of resurfacing products and methods, depending on your goals:
| Type | Description | Best For |
|---|---|---|
| Concrete Overlay | Thin cement-based material applied over the existing surface | Driveways, patios, garage floors |
| Self-Leveling Compound | Smooths out uneven or rough concrete with minimal effort | Interior floors, basements |
| Stamped Overlay | Decorative finish with texture that mimics stone, brick, or wood | Pool decks, walkways |
| Spray Texture Finish | Sprayed and textured surface for slip resistance | Pool decks, outdoor areas |
| Epoxy Coating | Durable resin-based surface for strength and shine | Garages, basements, industrial floors |
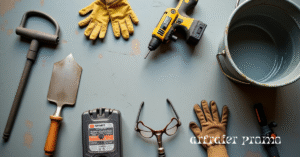
Tools and Materials You’ll Need
Before you begin, gather the following tools and materials:
-
Concrete resurfacer mix (choose based on the type of resurfacing)
-
5-gallon bucket or mixing container
-
Drill with paddle mixer
-
Trowel or squeegee
-
Concrete cleaner or degreaser
-
Pressure washer or stiff brush
-
Bonding agent (optional)
-
Protective gear (gloves, safety glasses, mask)
-
Edger (for corners and borders)
Step-by-Step Guide to Resurface Concrete
1. Clean the Surface
Start by removing dirt, grease, or loose debris. Use a pressure washer for thorough cleaning. For indoor spaces, a stiff brush and concrete cleaner can do the job.
2. Repair Any Cracks
Fill small cracks or holes with a patching compound. For deeper cracks, use a concrete repair caulk and let it cure according to instructions.

3. Etch or Prime the Surface (if needed)
Some resurfacers need an etching solution or bonding agent to help adhesion. Follow the product label.
4. Mix the Resurfacer
In a bucket, mix the resurfacing compound using a drill with a paddle attachment. Mix until smooth and lump-free. Only mix what you can use within 20–30 minutes.
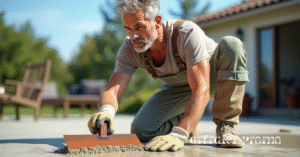
5. Apply the Resurfacer
Pour the mixture in sections and use a trowel or squeegee to spread it evenly. Work quickly and apply consistent pressure to avoid streaks.
6. Add Texture or Design (Optional)
For decorative finishes, use a stamp, broom, or texture roller while the surface is still wet.
7. Cure the Surface
Let the surface cure undisturbed for at least 24–48 hours. Avoid heavy traffic or rain during this period.
Pros and Cons of Resurfacing Concrete
| Pros | Cons |
|---|---|
| Cost-effective compared to replacement | Not suitable for severely damaged concrete |
| Quick and easy DIY project | Needs dry and warm weather for best results |
| Enhances durability and looks | Requires surface prep and proper mixing |
| Variety of finishes and colors available | May need sealing after curing |
Maintenance Tips After Resurfacing
-
Seal the surface to protect it from water and UV damage.
-
Clean with mild detergent and water; avoid harsh chemicals.
-
Reseal every few years depending on use and weather.
Conclusion
Resurfacing concrete is a simple, affordable, and effective way to restore your old concrete without a full replacement. By choosing the right type of resurfacer and using the proper tools, you can give your patio, driveway, or floor a like-new appearance in just a weekend.
Frequently Asked Questions (FAQs)
How long does resurfaced concrete last?
With proper maintenance and sealing, resurfaced concrete can last 8–15 years or more.
Can I resurface painted or sealed concrete?
Only if you remove the existing paint or sealer completely using grinding or etching.
Is resurfacing concrete better than replacing it?
Yes, if the surface is structurally sound and only has minor damage. Replacement is best for major cracks or uneven settling.
What temperature is ideal for resurfacing concrete?
Between 50°F and 90°F (10°C to 32°C) is ideal. Avoid freezing or overly hot temperatures during curing.